Wednesday, October 31, 2007

A way to fit 8 GBs of crap into a 4 .78 GB bag, DVD… Part 2


Okay so let's finish this project up.

So the ISO image is done and you are now shy about 8 GB of hard disk space. Oh did I mention you need a butte load of time and hard drive space to do this.

So let's open up DVD Shrink. If you haven't already, go ahead and close DVD Flick. Once DVD shrink is open go to File à Open Disc Image. Go to the ISO image that you made and open it. To speed things along uncheck the video preview.


Okay after that is done you can see that it has figured out what to do with it to shrink it down to the default desired size of 4.+ GB.
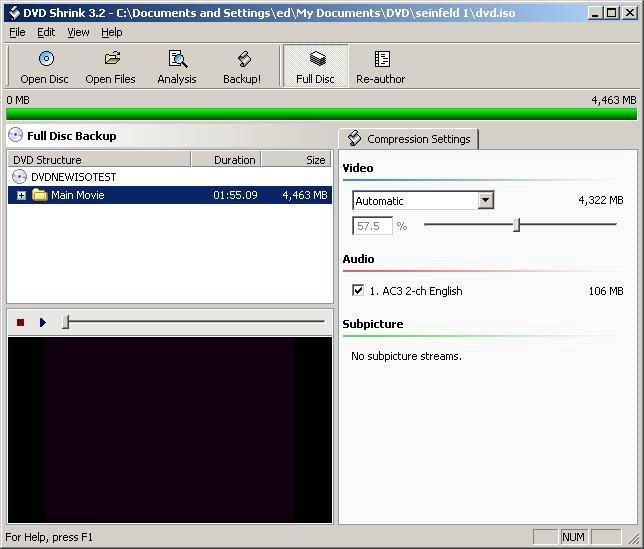

Photo Sharing and Video Hosting at Photobucket

Now you are thinking this will degrade quality and what not. Well maybe, yeah, I am pretty sure it will. But then again, I will be able to watch and enjoy it on my TV. Also if you have the time you can later on tell the program to take a little more time in the compression to allow it to have a better look. I don't, default settings for me. So now what? It is time to make another ISO, yes another one. That is unless you have Nero and then DVD shrink can use it to burn right to a disc. I do not have Nero.
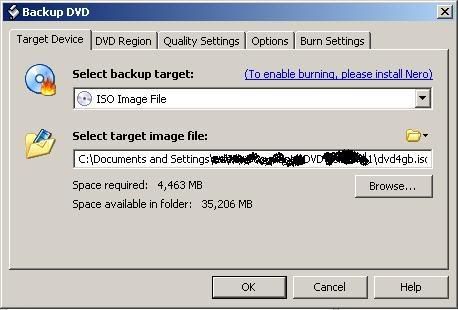

Photo Sharing and Video Hosting at Photobucket

So click the "Backup!" button already. Once clicked you get the Backup DVD dialog box. Choose your target. The image file path. Then choose any other settings you want. After you are satisfied, click OK.
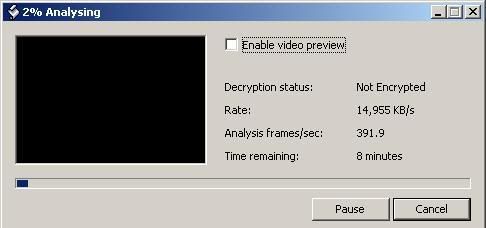


Photo Sharing and Video Hosting at Photobucket

After that it goes on its way. And you give your computer, unless you have multi core / multi processors, to the CPU process Gods. So go make you self some supper or whatever. From here I think you can get the rest. Open that 4.+ GB ISO file using an ISO burning software and burn it to your DVD-R.

Happy Burning.


A way to fit 8 GBs of crap into a 4 .78 GB bag, DVD… Part 1


I have videos on my computer. I want to make them into a DVD to play on my TV. There are plenty of tools out there, free or otherwise.


Well what are the problems with the homemade DVDs? Let me list one in particular, length of playtime. The length of DVDR is not as long as a normal DVD, an 8 gig one per say. Sure, I could get me a fancy dual layer 8 GB bad boy, but do to budget restraints this is not possible.


So here is my new found way.


I will be using freeware type software.

They are:

  • DVD Flick
  • DVD Shrink
  • Any DVD ISO burning software will work. I am using the Roxio software that came with the computer.

    Okay the basic principle here is

  1. I am going to use DVD flick to make an 8 GB dual layer DVD ISO and save it to the computer's hard drive.
  2. Then take that 8 GB DVD ISO, which was just made, and then shrink it to a 4.7 GB ISO using DVD shrink.
  3. Then burn it to a 4.7 GB DVD-R.


So, let's begin by opening the DVD Flick software.


Go into project settings and change the Target size to DVD DL (7.9 GB). This is what makes sure that your ISO is the dual layer size that it needs to be.


Photo Sharing and Video Hosting at Photobucket


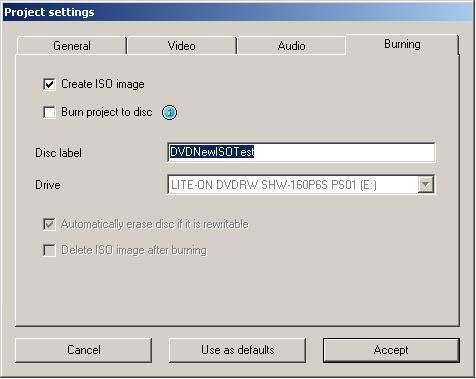
Next go to the Burning Tab and choose to make it into an ISO give it a name, I called mine DVDNewISOTest. You can call it whatever you want.


Photo Sharing and Video Hosting at Photobucket


Now take some time to go through the other tabs. Make sure your Target Format is set correctly in the video, as in NTSC or PAL. In the USA set it to NTSC, Europe set it to PAL.

Ok so once you are satisfied with the settings, click "Accept" and get out of there.


Also at this time before the ISO creation make sure you set the project destination at the bottom of the DVD flick software. Last, before creation save the project. It is not needed but just as a safeguard.


Now, add the videos using the "Add Title" button on the left hand side of the DVD Flick Software. If you want to go through and learn and understand the DVD flick software at this time, that is up to you. This is just my simple way of doing things.


Ok click "Create DVD" It will ask if you want to proceed. Well yeah duh. Now you can go to bed. Really it will take FOREVER, or like 6 hours or something like that. Now one of the best parts about this is it will ask you a question towards the end at "Finalize. The question will be, "Unable to find any cells that could be used for layer break!". Basically saying.. You made a single disc image but this is a dual layer ISO and I think I should split this. But we are NOT going to. Choose the option to not split it.


Photo Sharing and Video Hosting at Photobucket


Once that is done we can talk about the DVD shrink process. I will post that next.